Easy DIY Shop Cart
I recently built a pretty this easy DIY shop cart that I plan to use as my router table. In this blog, I want to share how I built this easy DIY shop cart for $100. It’s a simple DIY. Continue reading to learn exactly how to do it for yourself!
One of my favorite types of projects to build is furniture or storage for my shop. The reason being that I am able to build these items to work for me and my space—something that you don’t get when buying a piece from a store.
Additionally, it’s a great opportunity to practice existing skills or learn something totally new. I always jump at the chance to practice by building items for myself because there is little to no pressure. This is something I recommend for woodworking beginners to do as much as time allows.
What you need to build this shop cart:
- Table Saw – I use the DeWalt DWE7491
- Dado Stack – I have an Avanti set (I’ll explain why this is a good investment later)
- Circular Saw or Track Saw – I use the DeWalt DCS570B
- Wood glue
- 2 sheets of 3/4 plywood (4×8)
Build the Frame
1. Cut your panels to size
The frame of the cart I built was 23.5 inches wide x 23.5 inches deep x 30.75 inches tall. These dimensions allow you to maximize the usage of a sheet of plywood. You should be able to build the frame out of one sheet.
- Two panels at 23.5×23.5
- Two panels at 23.5×30
- One panel at 22.75×30
2. Cut your rabbets
This can be done a few different ways but my preferred method is with a table saw and dado blade. You can also do this with a router and dadoing bit if that is your preferred method. I chose to have the bottom and top panel have rabbets on 3 of the 4 sides for ease of assembly. The sides of the frame then had rabbets on just the back side so the back panel sits flush.
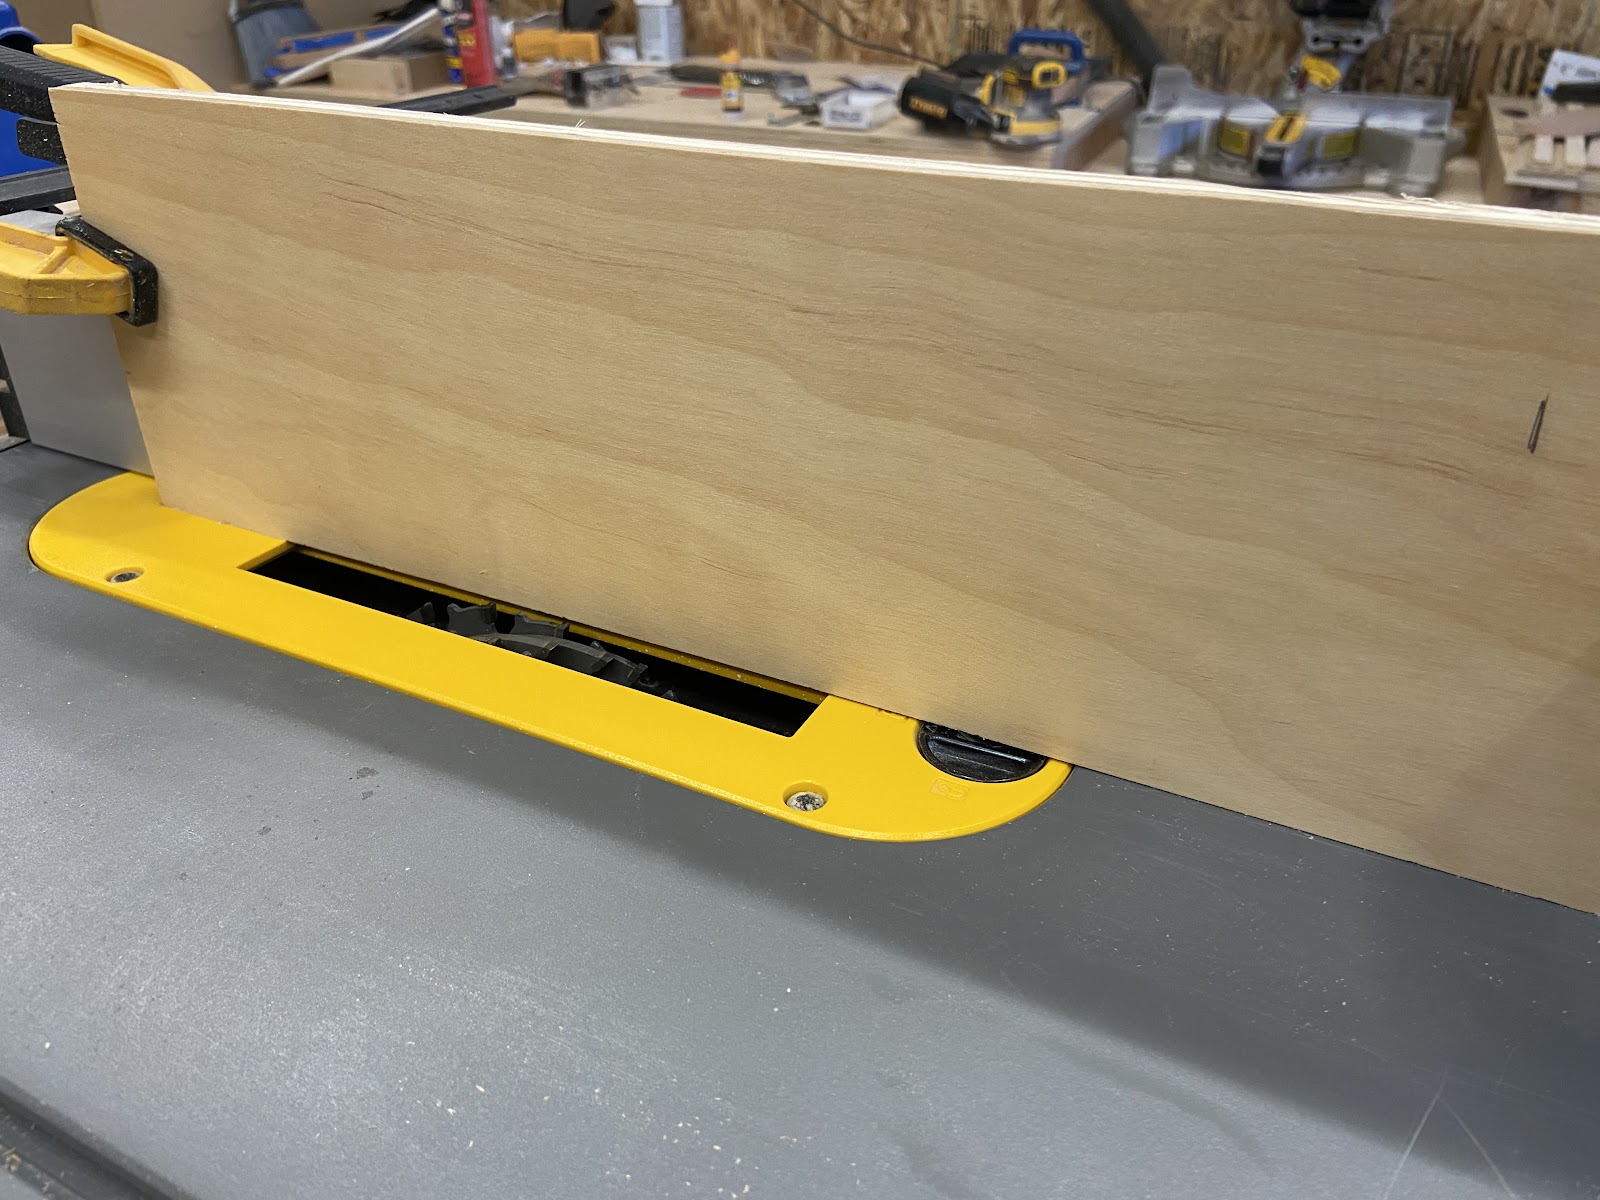
Install your dado blade stack, it should be 3/4 inch to accommodate the plywood width. I like to do half the thickness in depth so 3/8 in this case. On a table saw you should be using a sacrificial fence so that you can get right up to the edge of the board. To do this, set your blade below the table of your saw, clamp a scrap piece of wood to your fence (making sure the clamps won’t be hit by the blade), and set the fence so the wood will barely be cut by the blade as you raise the blade slowly. Now you can cut exactly on the edge of your board for your rabbets.
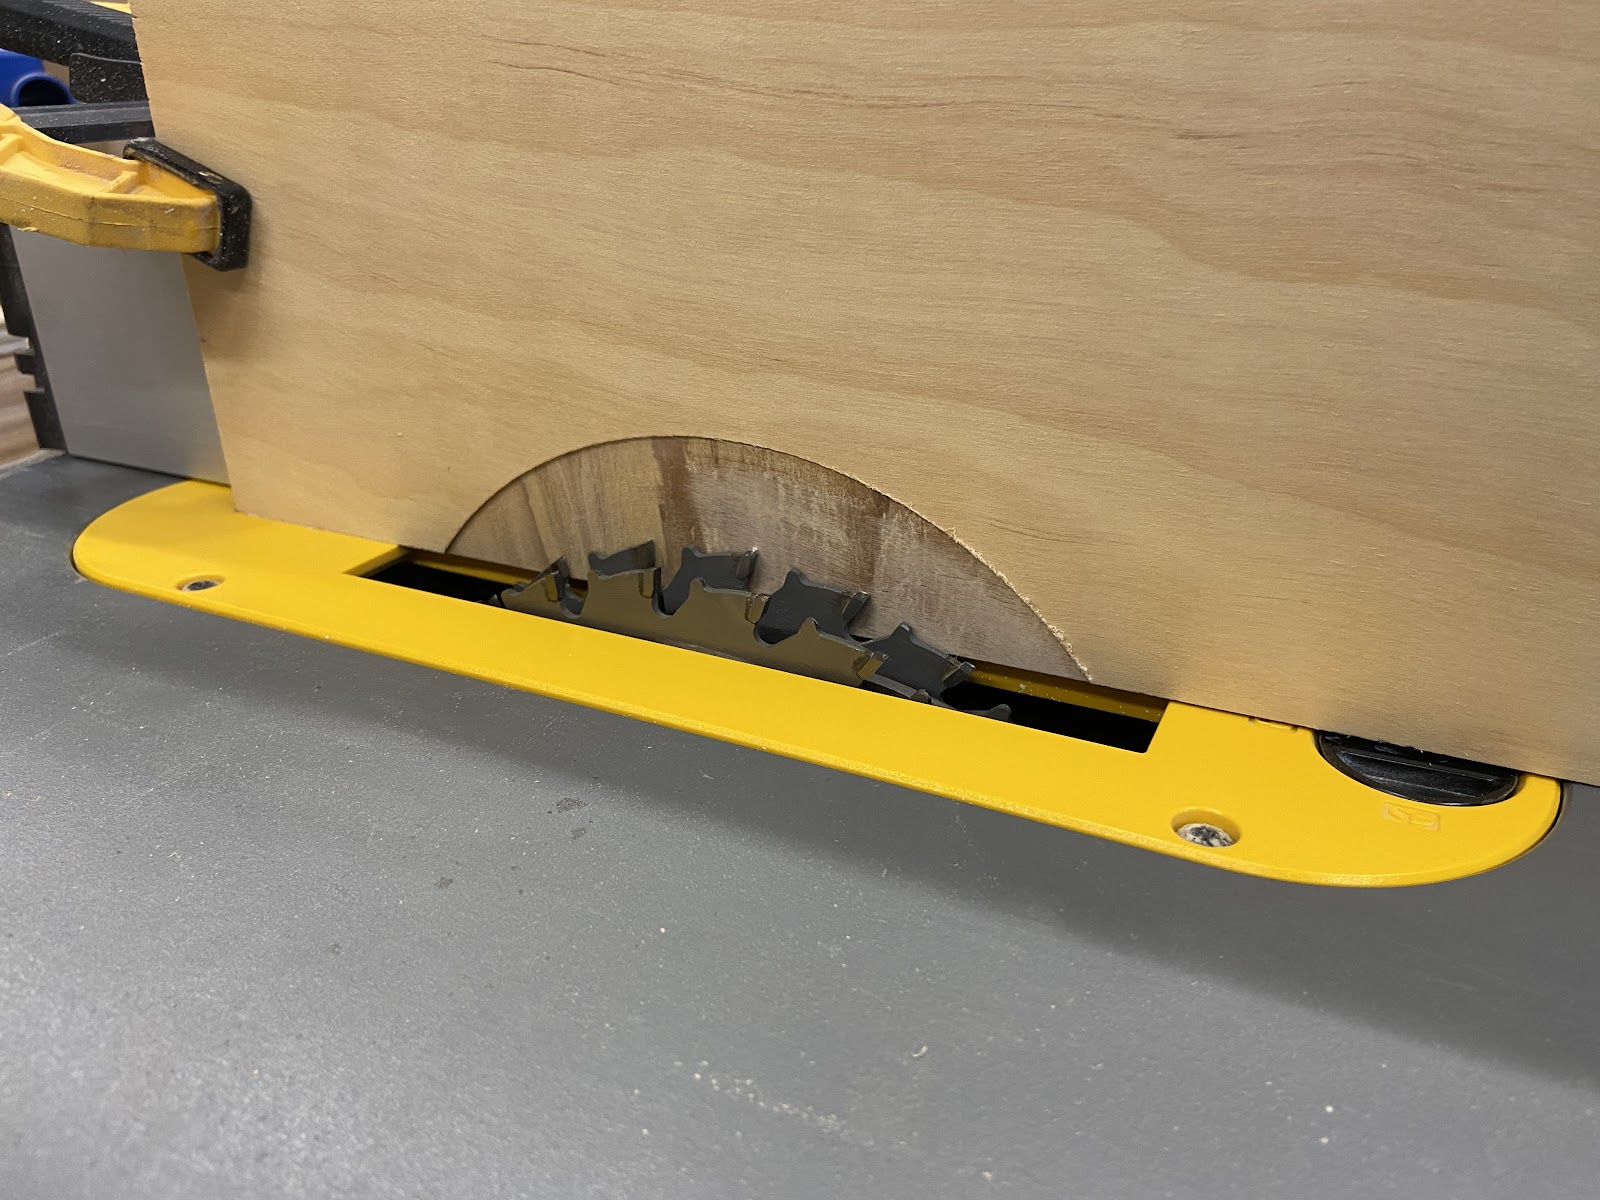
3. Cut your drawer dados
Here is why I think investing in a dado stack is a great idea. 20 inch drawer slides are at a minimum, 10 dollars for a set, but more like over 15. So just for this project, you would be spending 30 dollars minimum on slides. If you want any decent slides, you’re looking at 50 dollars. You can get a dado stack for around 50 dollars that can be used on countless projects. The same goes for a dado bit for a router.
To cut the dados for the drawers, I used my table saw for consistent reference. I set the first dado to be 7/8 of an inch above the very bottom of the sheet. This gives 1/8 of an inch clearance between the bottom of the carcass and the bottom of the drawer. I then spaced 4 dados 5.5 inches apart for each drawer.
4. Glue up the panels
The two 23.5×23.5 panels are your top and bottoms and the 23.5×30 panels are the two sides. The 22.75×30 panel is the back of the carcass.
Make sure that you are lining up your dado slots on the two side panels for your drawers. Glue and brad nails to hold everything together was my method on this.
Build the shop cart drawers
1. Cut your panels
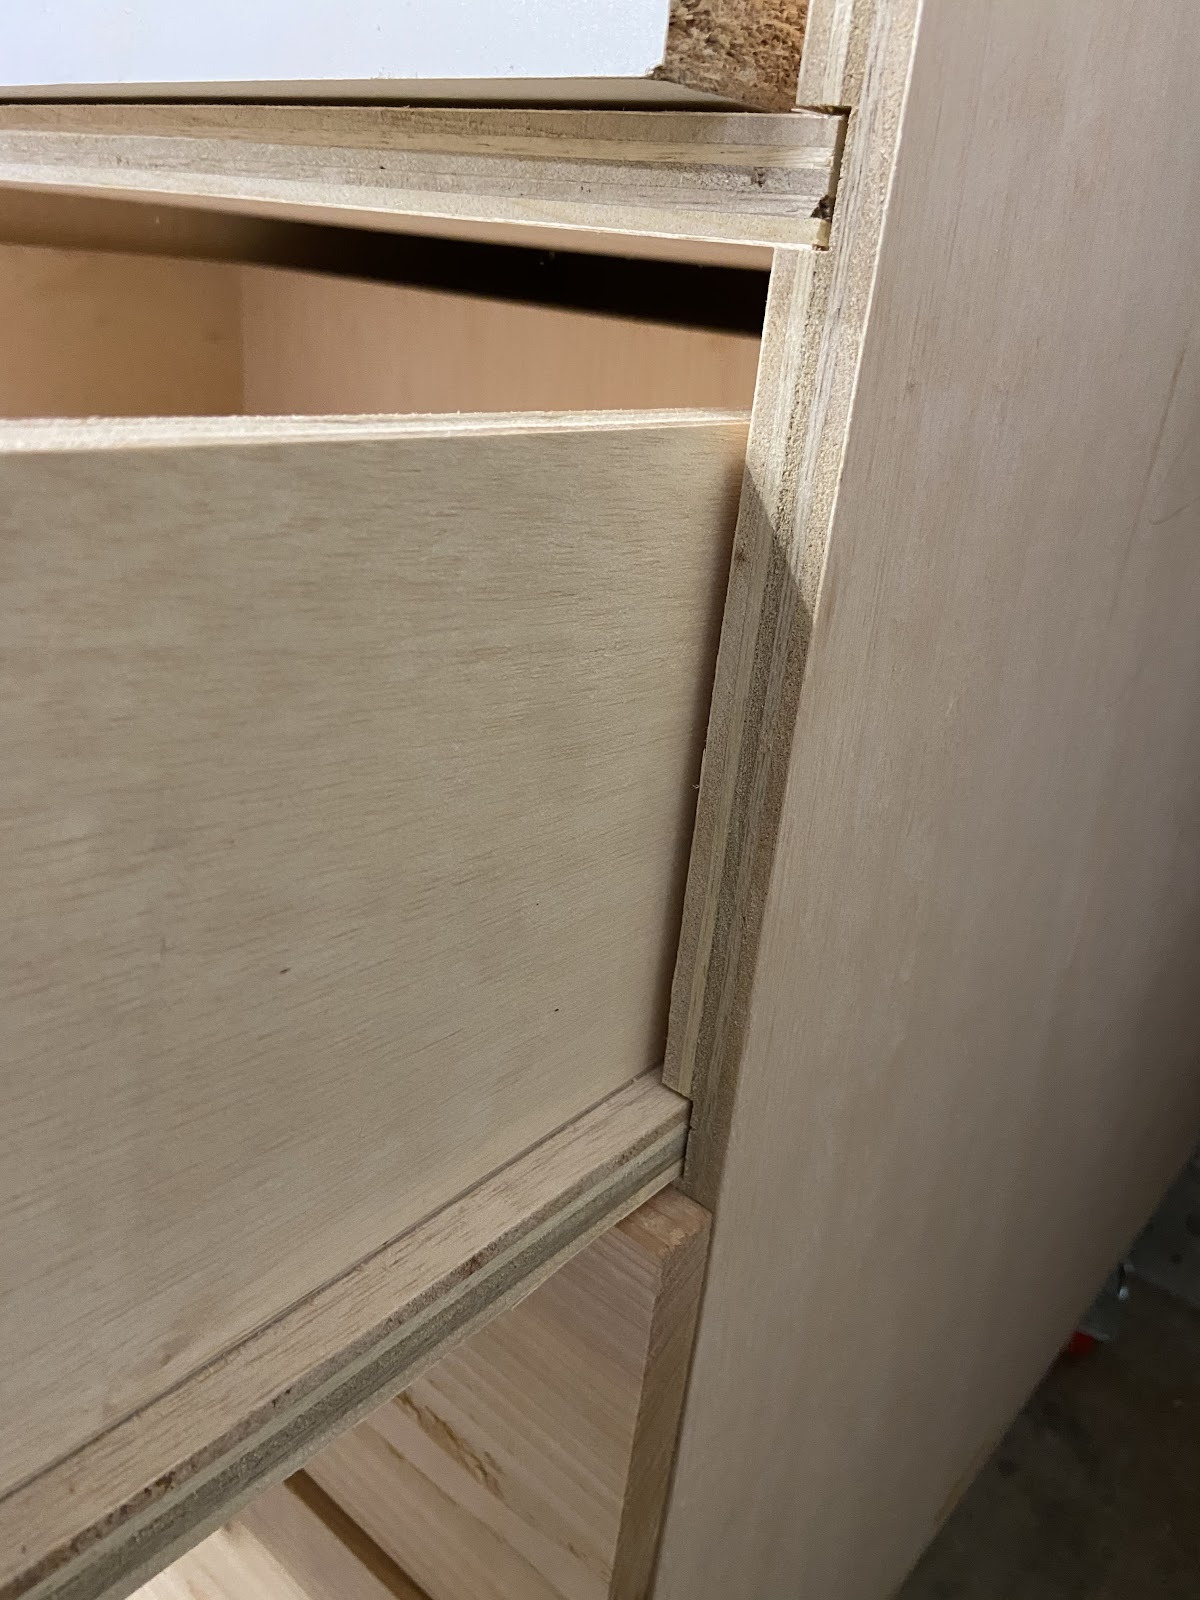
The 4 sides of your drawer should be less than 4 5/8 tall for each panel. The side panels should be 22 11/16 in length. The front and back panel should be 20 3/8 long. The bottom panel should be 22 11/16 x 22 11/16. These panels will slide into the dado grooves and act as both your drawer bottom and drawer slide. I cut enough for three drawers and one extra bottom panel for the top shelf.
2. Assemble your drawers
I used pocket holes and some glue to glue the outside frame of the drawer. After this was complete, I marked 3/8 of an inch from both edges of the bottom panel to align the sides of the drawer to the bottom. I put a little bit of glue on the bottom of the sides of the drawer and lined everything up. I then secured everything together with brad nails.
3. Wax paste the slides
On the overhang of the bottom of the drawer, I rubbed some wax paste to let the drawers slide much smoother.
4 . Assemble in to cart
At this point you can get everything into the cart and stand back and admire. Some things you could add to finish everything up.
- Drawer faces and handles
- Face frame and door on top
- Melamine top for small assemblies or router lift
- Casters on the bottom to make it mobile (I added 1/2 plywood as a reinforcement)
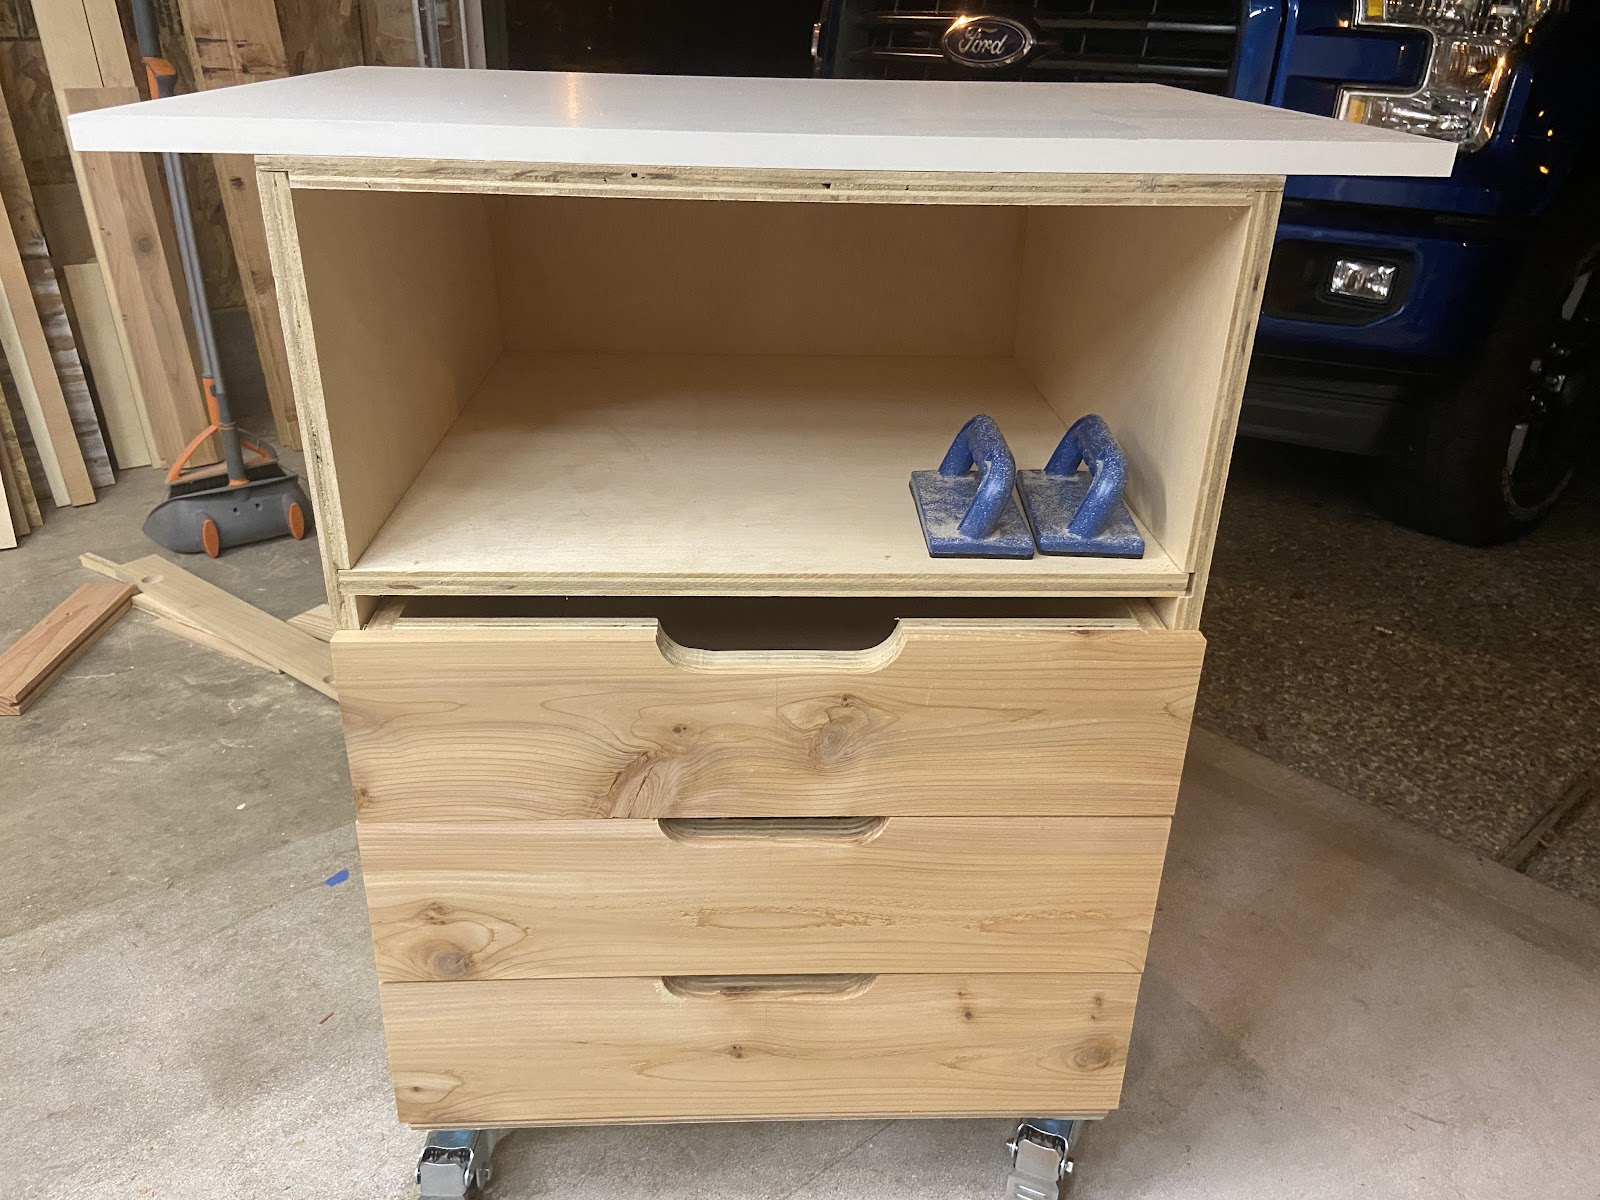
You’re all set. Enjoy your easy DIY shop cart. Tag me in your final photos on Instagram @beardedmoosewoodworking.